Showing posts with label recipes. Show all posts

Sunday, December 25, 2011

Christmas Eve: Holly Treats

Long ago, when I was maybe a third grader at Avery Elementary, I went to the Fall Festival. At the bake sale, somebody's mom had made these things that were sort of like rice krispie treats, but they looked like holly--little green leaves and red hot berries. I thought it was the coolest thing ever. I've never really forgotten those treats, but it never occurred to me that--with Google--I could figure out how to make them myself!

Well, Christmas Eve was the perfect time to figure it out. We Googled some recipes, and then Megan (the marshmallow treat expert), cooked us up some holly treats. Now you can make these in the shape of leaf clusters, like so. But we were not feeling ambitious, so we just threw ours in a pan. I was still 100% happy with the result.

- Kristin

I on the other hand, was not super happy with these Krispy treats. I thought they were too sweet! They differed from the S'More Krispys in that they used a lot less cereal so there was a lot more sugar coating to go around on these ones. If you used more cereal they wouldn't have been coated green all the way. Here is the recipe:

1 package large marshmallows
1 stick of butter
6 cups of cornflakes
1 tsp vanilla
1.5 tsp green food coloring
some Christmas M&Ms

1) Melt butter and marshmallows on low heat
2) Mix in vanilla and food coloring 
3) Stir in the cornflakes
4) Pour in some M&Ms (as many as you want!)

This time I was supposed to wait to put in the M&Ms so they didn't melt and make the treats look... non appetizing. But I just couldn't wait for things to cool down. I started pouring in the M&Ms as Kristin yelled, "Not yet! Not yet! You said you would wait this time!" You can imagine how I laughed and laughed as I stirred the marshmallows into the hot cornflake mixture. But.... the M&Ms didn't melt. I got to have a good laugh and Kristin got her non-brown treats.

- Megan Leigh

Wednesday, December 21, 2011

Good Food: Triple Chocolate Cookies

Another attempt at super-chocolatey cookies! This time I tried to recreate one of my all time favorites: Grand Central Bakery's Triple-Chocolate Cookies. In The Grand Central Baking Book, there is a recipe for these cookies, but it really requires a stand mixer. Not all of us have a stand mixer, though! I have a feeling that if you have a stand mixer and follow the recipe exactly, the cookies will turn out just like at the bakery. However, I've made this recipe us poor/space-challenged folks can use with a handheld mixer. I thought it turned out very well. Yummy, and the taste was right on... I suspect the only difference is that these cookies didn't puff up quite as much as at Grand Central.

4 oz. (4 sq.) unsweetened baking chocolate, chopped into chunks
10 oz. (1 bag) Ghirardelli dark chocolate chips
1 c. (2 sticks) unsalted butter, softened
4 eggs
1 and 3/4 c. sugar
1 and 1/2 tsp coffee
1 and 1/2 tsp vanilla
2/3 c. flour
1/2 tsp baking powder
pinch of salt
2/3 c. semisweet chocolate chips
2/3 c. chopped walnut pieces (optional)


1. Melt the unsweetened baking chocolate and dark chocolate chips in a metal bowl over a pan of boiling water. Make sure it doesn't burn!
2. Whip the eggs, sugar, and butter together in a big bowl. The mixture should be fluffy! Add the coffee and vanilla, and mix a little more.
3. Combine the dry ingredients, then dump them in the big bowl with the wet ingredients. Mix just long enough until the flour gets incorporated.
4. Add the melted chocolate mixture and mix just until the color of the batter is uniformly brown.
5. Stir in the semisweet chocolate chips. And the nuts if you like them.
6. Let the batter sit for 45 minutes. It will set up and become the consistency of normal cookie dough. You have got to believe!
7. Preheat the oven to 350 and bake on parchment paper-lined pans for about eight minutes. Drop the dough on the pan in heaping spoonfuls. The cookies will not look entirely done at eight minutes, but leave them on the pan for a few minutes and they will continue to cook. Then transfer them to a cooling rack until they aren't warm anymore. Our oven runs hot, so maybe they will take a little longer in yours. But don't let them burn whatever you do!

-Kristin

I didn't like these cookies so much. I ate them, but that's only because they contained chocolate and I was desperate. Whereas Kristin thought the taste was right on, I thought it was right off. I can't pinpoint what was so funny tasting, but they were. Time to continue the cookie search, I say.

- Megan Leigh

Rich. I didn't think they were terrible. It was just a lot of chocolate in a sweet little cookie. Something between this cookie and the last kind of cookie would be best--not a fluff ball, not a condensed chocolate substance.

- Ben

Saturday, December 17, 2011

Good Food: Double Chocolate Cookies

So, working at Elliot's book fair last week I had a lot of time to browse through random books. I happened across one called "The Cake Mix Doctor." At first, I thought the premise was really lame. This lady writes a whole book of recipes that rely on spiffing up cake mixes so that you end up with a delicious cake. If you read this blog, you'll know that I have been struggling to bake good cakes from scratch. So this idea of starting with a cake mix seemed hideous to me. I mean, is it really so hard to just mix together some flour and baking powder and sugar? Why involve a cake mix in all this?

But then I thought more about it. My from-scratch cakes have all turned out terribly. Maybe I *should* be starting out with a cake mix, I thought, at least for now, because my cakes from mixes actually turn out much better than my cakes from scratch. Maybe I can learn some tricks and some day work up to making a cake from scratch. And the book was 50% off, so I bought it. Why not give it a try?

As it turns out, there is also a section in the back for cookie recipes. I LOVE double chocolate cookies. But I have never tried to make them myself before. I don't know why. They just seem magical, I guess. Well today I felt bold and decided to give my first double chocolate cookie recipe a try. This recipe is a variation on one I found in The Cake Mix Doctor Returns. I thought it was decent!

The key is to under bake the cookies. I found they were best when baked for eight minutes, although the recipe called for 10-12. I also think these cookies need additions to be good. I added chocolate chips and walnuts. I think the cookies would be very bland without them--they are sort of light and taste like a cake mix, so they need the richness of the chocolate chips and nuts.


1 package (18.25 oz) chocolate cake mix
1 8 oz. package of cream cheese, softened
1 egg
1 tsp vanilla
1/2 stick butter, melted
about half a cup of chocolate chips (i used a mix of Nestle semi-sweet and Ghirardelli dark chocolate)
about half a cup of walnut pieces


1. Preheat the oven to 375.
2. Combine the cake mix, cream cheese, egg, vanilla, and butter in a large mixing bowl. Using an electric mixer, mix on low until the ingredients are just combined. Then mix on medium until the dough is thick and smooth. Note: This dough is really thick, so you probably really will want an electric mixer. I tried to do it by hand because I was too lazy to get out the mixer at first, but I gave up.
3. Stir in the chocolate chips and walnuts by hand.
4. Drop the dough by rounded spoonfuls onto ungreased cookie sheets (I cover mine in parchment paper).  Bake on the middle rack for about eight minutes for nice soft cookies. Note: You can cook a little longer for chewier cookies. Be careful and make sure they don't burn, though! Since the dough is so dark, it's a little difficult to tell when they are starting to become too done, and I burnt my first batch.

-Kristin

It was quite a nice surprise to come home to an empty house with bags and bags of these new chocolate cookies. No competition. I slowly ate away, enjoying every bite. I ate a lot of cookies tonight. They weren't the normal, doughy cookie we usually make. As Kristin said, much more cake like, but still very good (coming from one who hates cake).

I'm thinking next maybe we should attempt the delicious S'mores cookies we get from Westside Market?

- Megan Leigh

Sunday, December 11, 2011

One New Thing: Dough Ornaments, Day One

Today Elliot and I worked on dough ornaments while Poppy took her nap. The recipe is easy:

4 cups flour
1 cup salt
1 1/2 cups warm water

That's what it said, anyway, but I had to add a lot more water for it to get dough-ish. Then we baked them in the oven at 300 for a long time. Here is a preview of what they will look like! I thought they were fun to make, but I think Elliot got bored. At first, he was really excited, but he kept making huge sculptures, and I pointed out they would be hard to hang as ornaments. He pointed out that I am very critical. Then his attention started to be drawn by the show on the television. Ah well! I got two ornaments out of him.

We are still trying to decide: paint or no paint? We have to finish them tomorrow. Can you tell what the one in the upper left corner is?

-Kristin

Saturday, December 3, 2011

Good Food: Bogie Brownies

So these brownies are supposed to be Humphrey Bogart's favorites, and the recipe can be found on the Brownie Power website, which has great step-by-step instructions. These brownies are super easy to make, and my favorite thing about them is you can make them using only one pan--no extra bowls or anything! Compared to the last brownie recipe we tried, these brownies have lots and lots more butter, sugar, and eggs... all the rich stuff. And they are very bare-bones. Nothing extra! I think there may have been a typo in the instructions. It said to bake the brownies for 20-30 minutes at 300 F, which seemed very low... usually things are done way too early in our oven, but after 30 minutes the brownies weren't even close to done. Maybe they meant 375? Anyway, the brownies turned out pretty dry, but it may have been because they baked for a very long time at a weird temperature. They were also very cakey, rather than fudgy--they puffed up big time. If I made these again, I would bake them at a higher temperature. But I'm not sure I will, since there are so many good brownie recipes out there! Why fiddle around with one that isn't amazing?

Megan took this picture of the brownie. It's pretty awful. It might be the worst picture of food so far on this blog. We need to work on our photography skills!

-Kristin

There was certainly no fear of me yelling at the others in the house, "Quit Bogarting the brownies!"

- Megan Leigh

Thursday, December 1, 2011

Good Food: Chocolate Chip Muffins

As you can see from the picture these muffins aren't huge and gorgeous or anything. But they are easy to whip up, tasty, and not sickeningly sweet. You know, like those Otis Spunkmeyer muffins that a certain mother buys a certain sister when she goes home... Yes, I know what goes on in St Louis when I am not around. Anyway, these muffins are understated.

6 tbsp butter, softened
3/4 c. sugar
1/2 tsp salt
3 tsp baking powder
2 c. all-purpose flour
2 eggs
1/2 c. milk
1 c. chocolate chips (or whatever seems right)

1. Preheat oven to 400 and grease a muffin tin.
2. Mix together the butter and sugar, until it is all creamy, in a big bowl.
3. Mix the salt, baking powder, and flour in a smaller bowl.
4. And then in a liquid measuring cup, beat the eggs with the milk.
5. Pour 1/3 of the the dry ingredients into the butter mixture, then add a little of the milk/eggs. Keep repeating until everything is mixed together. If it looks too thick, add a little more milk.
6. Mix in the chocolate chips.
7. Divide the batter between 12 muffin tins and bake for about 20 minutes, until they are nice and golden!

-Kristin

Saturday, November 26, 2011

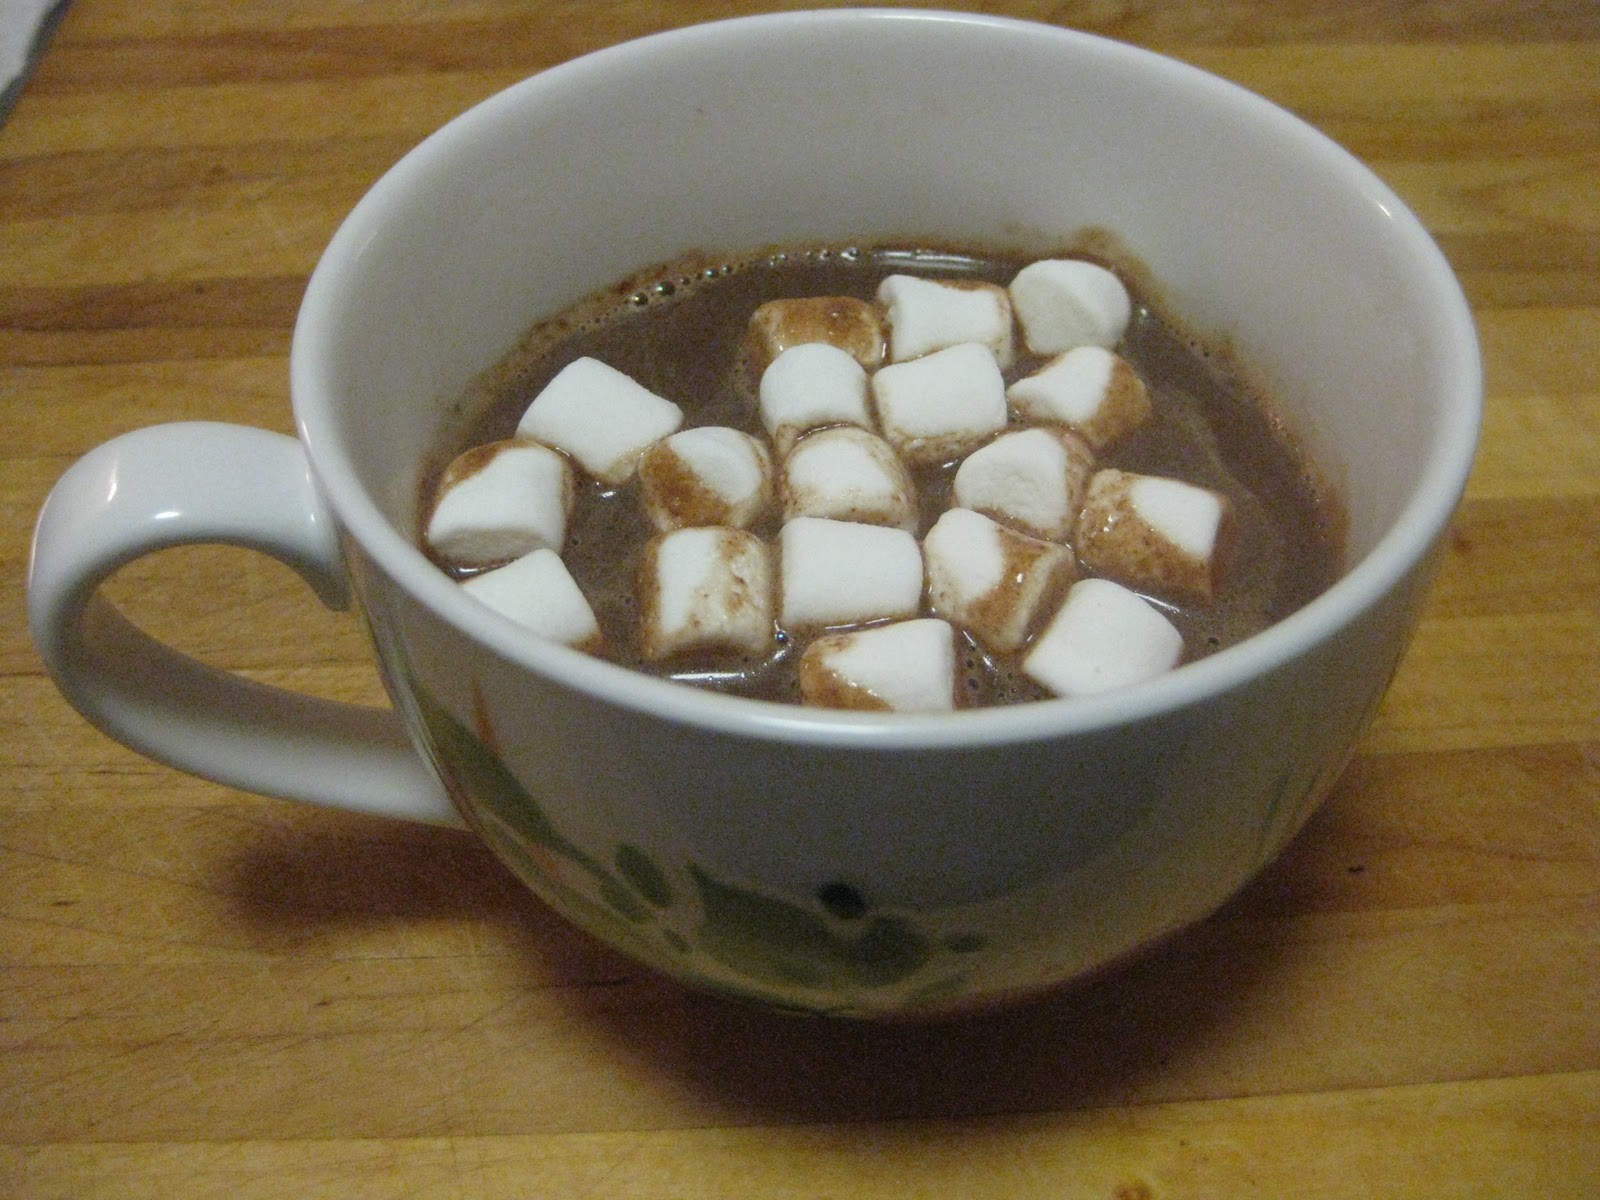
Good Food: Hot Chocolate

This is my attempt at recreating the hot chocolate from Wafels and Dinges. It's surprisingly easy to make your own--almost as easy as using a mix--and I think the result is really nice. Deep and rich without being sickeningly sweet!

*Milk
*Good chocolate chips (I like Ghirardelli dark chocolate)
*Cinnamon

Heat up as much milk as you want in a saucepan over low heat. Then drop in as many chocolate chips as you want, whisking them around until they melt. For four cups of milk, I use about four handfuls of chocolate, but you can taste as you go and stop when it tastes right. After the chips melt sprinkle in some cinnamon, then keep heating it up and whisking now and then (without letting the milk boil), until the hot chocolate is a uniform color, all the graininess has gone away, and it is nice and hot. Simple, right?

Do you like the cup? It was a gift from Madison. Thanks Maddie!

-Kristin

Friday, November 25, 2011

No Meat Meal: Pumpkin Oatmeal

I'm not actually a big oatmeal fan, but I do get excited about this kind of oatmeal. Steel cut oats are kind of a pain to make since they take longer, but they are so much more satisfying than rolled oats, in my opinion.

4 c. water
1 c. uncooked steel cut oats
milk
1/2 tsp vanilla
1 heaping tsp pumpkin pie spice (or 1/2 tsp cinnamon, 1/4 tsp ground ginger, 1/8 tsp ground allspice or cloves, 1/8 tsp nutmeg)
2-3 tbsp brown sugar
1 c. fresh or canned pumpkin
toppings (dried fruit, nuts, etc.)

Bring the 4 c of water to boil over highish heat. Stir in the oats and keep boiling on high until the water starts to get a little murky and it looks like the oats are starting to soften. Then turn the heat down low, and simmer for about half an hour, or until the consistency is right and the oats are soft. Stir in milk to add extra liquid as needed. Once the oats are getting pretty near to done, add the vanilla, spices, and pumpkin, and stir in. That's it! I like to top mine with dried cranberries and walnut pieces.

You can also make this recipe in the slow cooker if you want. It's a little easier in that you don't have to keep stirring it. A few stirs is fine. But it does take hours, and I don't typically think ahead that far!

-Kristin

Monday, November 21, 2011

Good Food: Red, Gold, Black and Green Chili

I adapted this from a recipe in the Moosewood Restaurant Cooks at Home. Elliot requested that I add meat, so I did, and then we had to do some last minute adjustments when we were cooking. I think this is a pretty good chili! And it is really easy and pretty quick to make. Here is our recipe:

1/2 c. rice (the original recipe calls for bulghur, which is also good, but if you don't have it on hand rice is fine)
1/2 c. hot water
3 c. undrained canned tomatoes (28 oz can)

3 tbsp olive oil
3 c. chopped onions
1 lb ground turkey
2 tsp. ground cumin
1 tbsp. chili powder
1/2 tsp. cayenne

2 green bell peppers, chopped
3 garlic cloves, minced or pressed
2 cups frozen corn
1 14 oz. can black beans
1 14 oz. can red beans
salt

grated cheddar cheese
sour cream
chopped fresh cilantro

Place the rice, hot water, and a cup of juice from the canned tomatoes in a small saucepan. Cover and bring to a boil on high heat, then lower the heat and simmer gently. (Note: if you want to save a pan, Ben thinks that you can just throw the rice and tomato juice in with the tomatoes and simmer the chili for longer.)

While the rice cooks, sauté the onions, turkey, cumin, chili powder, and cayenne in the olive oil. Once the onions are soft, stir in the bell peppers and garlic and sauté for a few more minutes. Chop the tomatoes in the can and add them (juice and all) to the pan. Stir in the corn and beans and heat everything thoroughly at low heat. Add the rice when it is a little undercooked, then cover and simmer until the rice is done and the flavors meld. Add salt to taste.

Serve with garnish of cheddar cheese, sour cream, and cilantro.

I tried a cornbread recipe from How To Cook Everything, but it was not a hit.

-Kristin

I really liked this chili. Of course, I would have NOT added the meat!

- Megan Leigh

Saturday, September 24, 2011

Good Food: Popovers Take 3

Finally, success! This time I used the recipe that Michelle posted on this blog earlier (it's her mom's). A big thank you to Michelle and her mom. This recipe was so easy, and it worked so well! The popovers popped BIG TIME. After taking them out of the oven, they fell a bit, but they were still light, airy and delicious. Kind of custardy, or dutch baby-ish. The other popovers we had made were very dense. These ones were more or less hollow inside (perfect for filling up with butter, Elliot said, and then declared that we should call them buttercups). I'm including a picture inside the oven, to show just how much they popped, and then one after they had been taken out. Yum!


Ben cooked up a "rustic applesauce" to eat with our popovers, and that was a pretty great pairing.

Mrs. Ferris's Popovers
4 large eggs (room temperature)
3/4 cup milk (room temperature)
2 tbsp butter, melted
3/4 cup unsifted all-purpose flour
1 tsp salt

Heat oven to 375 degrees.

Grease muffin/popover cups- this should make about 8/6 popovers depending on size of tins.

Beat eggs til frothy.

Beat in milk and butter.

Add flour and salt to egg mixture- beat at low speed til smooth.

Divide into prepared cups.

Bake 35- 40 minutes or until puffed and firm on top.

-Kristin

Friday, September 23, 2011

Good Food: Tried and True Oatmeal Cookies

One of the only things that I can bake and feel truly confident about are cookies. Two kinds, chocolate chip and oatmeal. Tonight I had to bake oatmeal cookies for my son's soccer team (I know this makes me sound like a sad soccer mom), so I thought I'd share the recipe I use. It used to be on the bottom of the lid on Quaker Oatmeal containers, but the current recipe gracing the lid is not nearly as good... I think they tried to reduce the fat and sugar content, and you can tell. So here is my tried and true version!

My one biggest tip is to use margarine. I know, margarine is gross. But cookies are the one area in which I think margarine earns a place. If you want a soft, chewy cookie, margarine works so much better... If you want a hard, dry cookie, butter is a better choice. But who wants a hard, dry oatmeal cookie? Also, I think Fleischmann's in the tub is the best kind to use. I used Country Crock out of desperation tonight, but the cookies aren't quite as good.

Vanishing Oatmeal Raisin Cookies (Circa 1998)
1 c. butter
1 c. firmly packed brown sugar
1/2 c. granulated sugar
2 eggs
1 t vanilla
1 1/2 c. all-purpose flour
1 t baking soda
1 t cinnamon
1/2 t salt
3 c Old Fashioned Quaker Oats
1 c. raisins
1 c. chocolate chips (optional)

Preheat oven to 350.

Beat together the margarine and sugar until creamy.

Add eggs and vanilla; beat well.

Add combined flour, baking soda, cinnamon, and salt. Mix well.

Stir in oats, raisins, and chocolate chips (if you're using them).

Drop by rounded tablespoonfuls onto an ungreased cookie sheet. Bake 10-12 minutes until gold brown. Cool 1 minute on the cookie sheet, then remove to a wire rack.

Makes about 4 dozen.

-Kristin

Tuesday, September 20, 2011

Good Food: Ants on Trees with Shredded Carrot Salad

I love ants on trees (the little pieces of pork are the ants, and the noodles are the trees), and we've made this a couple times for friends. Tonight we made this for Rachel and Mark. Here we are eating it--if you look closely, you can see the food on our plates. I didn't think ahead and take a close-up photo of the food! Ben made up this recipe for a carrot salad to accompany it, and I love it too.

Ants on Trees (Serves 5-6)
1 lb ground pork
4 tbsp soy sauce
1 tbsp sugar
2 tbsp roasted red chili paste
2 tsp corn starch
16 oz cellophane noodles
4 tbsp peanut oil
4 scallions, the white and light green parts only, thinly sliced
4 jalapenos, minced
1 c. chicken stock
2 tbsp soy sauce
cilantro, chopped

In a medium bowl, combine the 4 tbsp soy sauce, sugar, red chili paste, and cornstarch. Add pork to the marinade and refrigerate for 20 minutes.

Place the noodles in a large bowl and pour boiling water over them to cover. Soak 5 minutes, stirring occasionally (this part is important), then drain in a colander.

Heat oil in a skillet or wok over medium-high heat. Add the scallions and jalapeno and cook 30 seconds, stirring frequently. Add the pork and stir-fry until no longer pink, breaking up any chunks, about 3 minutes.

Add the noodles, chicken stock, and 2 tbsp soy sauce. Cook, tossing the noodles with two wooden spoons, until the sauce is absorbed and the pork is well distributed throughout the noodles. Serve immediately and garnish with cilantro.


Carrot Salad (Serves 6)
1 lb of carrots, grated and drained
1 heaping tbsp of ginger, finely minced
1/2 c. cilantro, finely minced
1/2 c. of peanut oil
 2 tsp of sesame oil
1/2 c. of rice vinegar
1 tsp of sugar
salt and pepper to taste
crushed cashews to garnish

Combine all the ingredients but the carrots in a bowl and whisk. Toss in with the carrots (which should be grated and drained first), and cover and put in the fridge to sit at least 2 hours (or as many as 24 hours). Garnish with crushed cashews and serve!

Megan notes that if you don't grate your finger, you're not doing it properly.

- Kristin